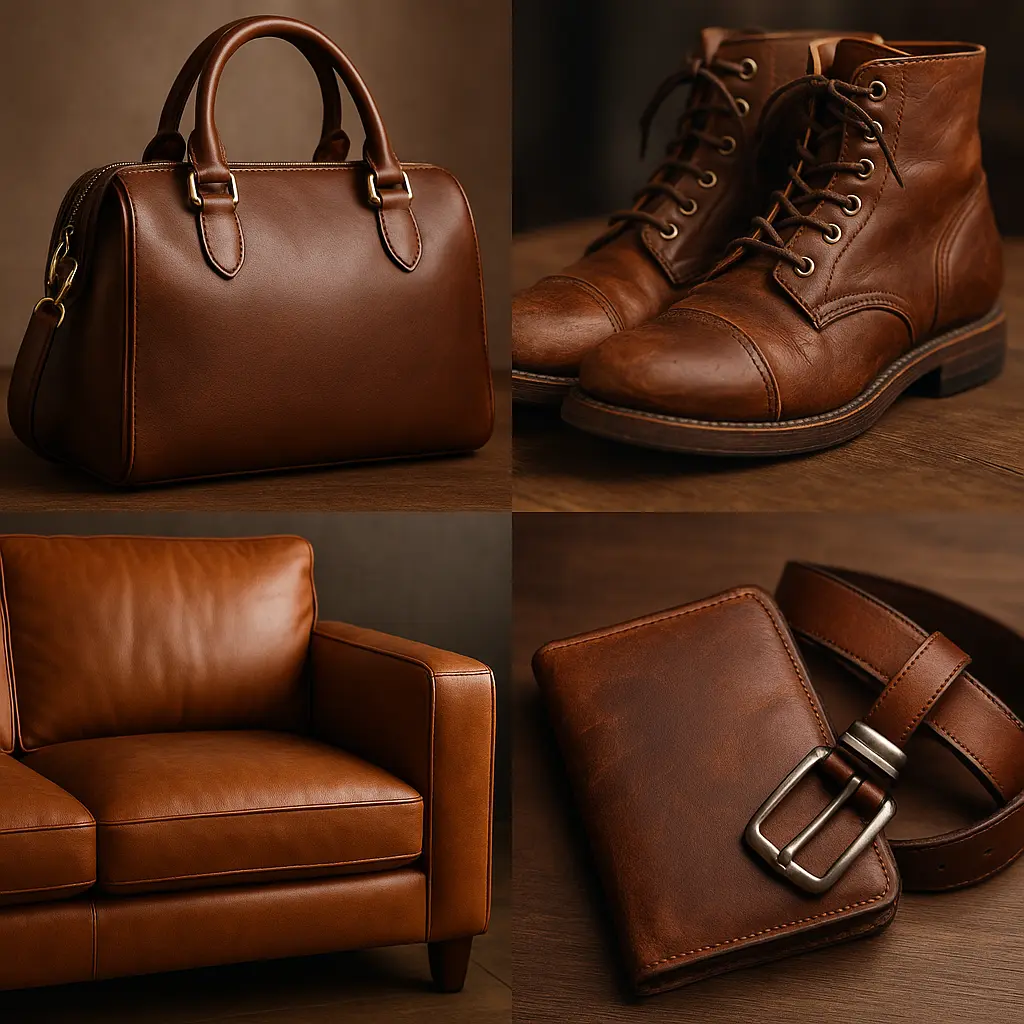
Leather. The very word evokes a sense of durability, timeless style, and luxurious touch. From the supple embrace of a favourite armchair to the rugged elegance of a well-traveled bag, leather goods are investments that, with the right care, can last a lifetime and beyond. It’s a material prized for its robustness, adaptability, and unique aesthetic that often improves with age.
But let’s be honest. Life happens. That pristine surface can meet an errant key, a spilled drink, or simply the slow march of time leading to dryness and cracks. Understanding how to navigate these common leather afflictions – scratches, cracks, and water damage – is not just about maintenance; it’s about preserving the integrity and beauty of your cherished items. For designers or brands, it’s about ensuring the longevity and perceived value of your creations.
This guide is your comprehensive companion to demystifying leather repair. We’ll delve into identifying crucial differences between leather types, actionable step-by-step techniques for various damages, tailored advice for different leathers, proactive preventative care, and guidance on when to DIY versus calling professionals. The fear of damaging leather is common , but we aim to empower you with solutions.
As manufacturers committed to the highest standards of leather quality, we believe that understanding its care and repair is fundamental. This knowledge empowers designers and product developers to select suitable leathers, considering wear and repairability. For brands, it’s an opportunity to educate consumers and build loyalty. For knowledgeable consumers, it’s the key to extending the life of beloved possessions.
Ultimately, the journey of a leather product includes its moments of wear and repair. How these are handled speaks volumes about the quality of the material and the knowledge of its caretaker.
Know Your Hide: A Practical Guide to Leather Types & Why It Matters for Repair
Before you even think about reaching for a cleaner or a conditioner, the absolute first step in any leather repair journey is correctly identifying the type of leather you’re dealing with. This isn’t just a trivial detail; it’s the foundation upon which successful restoration is built. Different leathers possess vastly different structures, finishes, and, consequently, reactions to damage and repair methods. Using the wrong technique or product can, at best, be ineffective and, at worst, cause irreversible damage.
The choice of leather for a product intrinsically designs its “repair journey.” A material like aniline leather, for instance, offers an unparalleled luxurious feel but demands more cautious use and highly specialized repair techniques, significantly impacting the long-term ownership experience. Conversely, pigmented leather provides greater durability and simpler repair options, making it a more practical choice for high-use items. This understanding is vital for designers and brands.
Let’s break down the common leather types you’ll encounter.
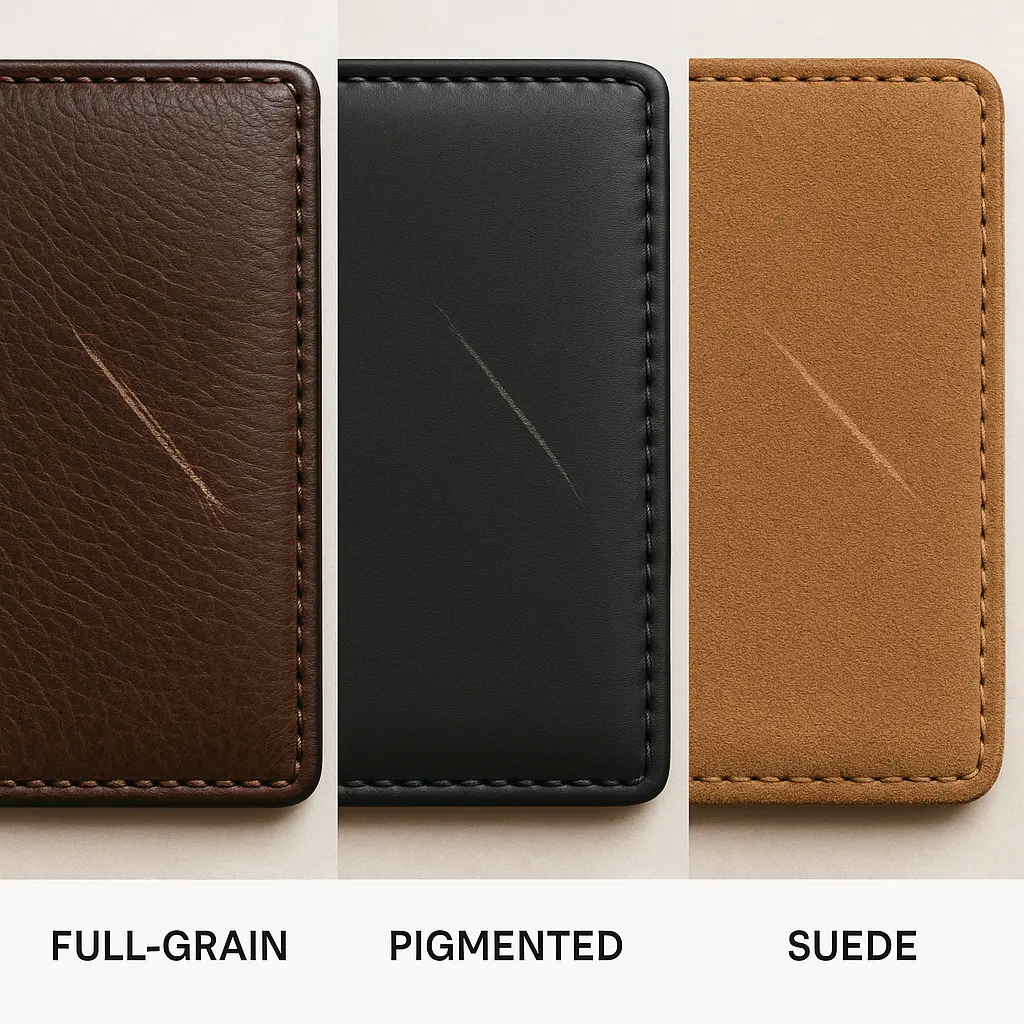
Full-Grain Leather
Characteristics: Hailed as the highest quality and most durable leather, full-grain comes from the top layer of the hide and includes the entire natural grain. This means all the hide’s original textures, pores, and natural “imperfections” – like scars or wrinkles – remain visible, contributing to its unique character. It develops a beautiful patina with age and use.
Visual/Tactile Cues: You’ll see unique, natural grain patterns; it often has a rich, substantial feel.
Repair Relevance: Scratches can sometimes be buffed or conditioned to blend in, becoming part of its patina. Its strength and breathability influence repair treatments.
Top-Grain Leather
Characteristics: The second-highest quality, top-grain leather’s outermost surface has been sanded or buffed to remove imperfections, resulting in a more uniform appearance, often with a finish coat.
Visual/Tactile Cues: It presents a smoother, more consistent texture than full-grain. It’s generally pliable.
Repair Relevance: The finish is key. Scratches can damage this finish. Top-grain leather does not develop a significant patina. Repairs aim for a uniform look.
Pigmented (Corrected-Grain) Leather
Characteristics: This leather has its surface imperfections heavily sanded or buffed. An artificial grain is often embossed, followed by a pigmented color coat and a protective topcoat, creating a uniform, durable, and stain-resistant surface.
Visual/Tactile Cues: Expect a very uniform color and grain pattern. It might feel “coated.” It’s initially very resistant to stains and scratches.
Repair Relevance: Repairs focus on the pigmented topcoat. Accurate color matching is essential. Cracks often appear in the finish layer first.
Aniline Leather (Often Full-Grain)
Characteristics: Aniline leather is dyed using soluble, transparent dyes that penetrate without coating the surface, so the natural grain, pores, and markings remain visible. It’s known for its exceptionally soft, warm, and luxurious feel.
Visual/Tactile Cues: It has the most “natural” look, with visible pores and imperfections. It feels incredibly soft and supple. It scratches very easily and readily absorbs liquids.
Repair Relevance: Aniline is the most delicate and challenging to repair. Repairs must be gentle. Stains and water damage are major concerns.

Semi-Aniline Leather
Characteristics: Semi-aniline leather starts as aniline-dyed but receives a thin protective topcoat or light pigment layer, offering more durability than pure aniline while retaining a natural look.
Visual/Tactile Cues: More natural than pigmented leather but more uniform and stain-resistant than pure aniline. Some natural markings may be visible.
Repair Relevance: Repair methods often combine techniques for aniline and pigmented leathers. The thin topcoat can be compromised.
Suede Leather
Characteristics: Suede is typically made from the flesh side of a hide or a split, buffed and brushed to create its napped, velvety texture.
Visual/Tactile Cues: It has a soft, fuzzy, matte appearance. Fibers move when brushed.
Repair Relevance: Suede is highly absorbent and prone to staining, water damage, and matting. Repair focuses on specialized cleaning and restoring the nap. Water is generally best avoided.

Nubuck Leather
Characteristics: Nubuck is top-grain leather sanded on the grain side to create a fine, short, velvet-like nap. It’s generally more durable than suede but shares its delicate napped surface.
Visual/Tactile Cues: It has a fine, soft nap, often shorter than suede. It scratches easily, and the color can appear to change where the nap is disturbed.
Repair Relevance: Care and repair are similar to suede, requiring specialized brushes and cleaners. Nubuck is also prone to oil, grease, and water stains.
Key Consideration: Why Does Leather Type Dictate Repair? Understanding these distinctions is paramount. Porosity varies greatly; highly porous leathers like aniline, suede, and nubuck absorb liquids differently than less porous pigmented leather. The finish is key – its presence, type, and thickness determine if you’re repairing the leather fibers or the surface finish. Fiber structure differs as well; dense full-grain fibers react differently than looser suede fibers.
This knowledge allows you to confidently address specific damage. A misidentified leather can lead to a repair attempt that causes more harm than good.
Table 1: Leather Identification & Repairability Quick Guide
| Leather Type | Key Visual/Tactile Cues | Common Vulnerabilities | Primary Repair Goal | Ease of DIY Repair (1=Hard, 5=Easy) |
|---|---|---|---|---|
| Full-Grain | Natural grain, unique marks, develops patina, strong feel | Scratches (can blend with patina), some water sensitivity | Sympathetic to natural aging, blend repair | 3-4 |
| Top-Grain | Smoother, uniform finish, imperfections removed, durable | Scratches (can expose underlayer), finish damage | Seamless, uniform restoration | 3-4 |
| Pigmented | Very uniform color/grain (often artificial), coated feel | Finish cracking/peeling, scratches to topcoat | Restore topcoat color & sheen | 4-5 |
| Aniline | Visible natural pores/marks, very soft, no topcoat | Scratches, stains, water spots, fading, very absorbent | Gentle blending, preserve natural look, challenging | 1-2 |
| Semi-Aniline | Natural look with light protective coat, balances aniline/pigmented | Scratches, some staining, finish wear | Balance natural look with finish repair | 2-3 |
| Suede | Napped, velvety, matte texture, fibers move | Stains, water damage, matting, absorbent | Clean, restore nap, specialized products | 2-3 |
| Nubuck | Fine, short velvet-like nap, more durable than suede | Scratches, oil/grease stains, water damage, absorbent | Clean, restore nap, specialized products | 2-3 |
Banishing Blemishes: Expert Techniques for Leather Scratch Repair
Scratches are common, ranging from faint scuffs to deep gouges. Their appearance and repair vary by leather type.
Visual Characteristics of Scratches on Different Leathers: Scratches on full-grain leather might appear as lighter lines that can blend with the patina over time. Deeper scratches show exposed fibers. On top-grain leather, scratches often remove the finish, revealing a different texture or color. Pigmented leather scratches typically damage the color coat, showing a lighter underlying color. Aniline leather is highly susceptible; scratches are very visible as lighter lines. Even a fingernail can mark it. Suede scratches disrupt the nap, causing matting or fiber removal, potentially exposing the underlying structure. Nubuck scratches also disturb the nap, appearing flattened or a different shade.
Repairability depends on scratch depth, leather finish, and skill. A minor scratch on aniline can be harder for a novice than a deep scratch on pigmented leather.
A. Light Scratches & Scuffs: The Gentle Touch
For minor abrasions, blend the scratch by redistributing oils, rehydrating, or restoring the surface.
Full-Grain & Aniline Leather: Very light scratches can often be diminished by gently buffing with a clean, soft microfiber cloth. For more persistent ones, apply a small amount of high-quality leather conditioner for aniline or full-grain leather (e.g., or ) with a soft cloth in gentle circular motions. On aniline, rubbing a minor scratch with a clean finger can sometimes help. Some suggest olive oil or petroleum jelly sparingly, but test first as they can stain. Distilled water on a cloth can sometimes revive light aniline scratches.
Expert Tip for Aniline Leather: Clean with an aniline cleaner (like ), apply an aniline-specific scratch remover (e.g. or ), then follow with an aniline care lotion (e.g.).
Top-Grain & Pigmented Leather: Always clean the area with a mild leather cleaner for finished leathers. A good leather conditioner can hide minor scuffs. For minor color loss, a color-matching polish or cream is effective. Colorless shoe polish or leather markers can be used for very light scratches or nicks.
Suede & Nubuck Leather: The goal is to lift and restore the nap. Use a dedicated suede/nubuck brush. A suede or nubuck eraser can gently rub out scuffs. For nubuck, a soft nubuck cloth can be effective. Avoid water unless using a specialized cleaner, and always test first. Consider specialized cleaners like or general suede/nubuck solutions.
B. Deep Scratches & Gouges: Intensive Restoration
Deep scratches damage fibers or the finish, requiring cleaning, possibly sub-patching, filling, color-matching, and sealing.
General Steps for Most Smooth Leathers (Full-Grain, Top-Grain, Pigmented):
Clean Thoroughly: Use a leather-specific cleaner.
Prepare the Scratch Area: Trim frayed fibers. Light sanding (320-1200 grit) may be needed for some finished leathers to smooth edges and aid filler adhesion. Caution: Sanding is generally not for aniline, suede, or nubuck by DIYers.
Apply Leather Filler: Use a flexible leather filler (e.g., , or specialized ranges like or ) in thin layers with a palette knife or spatula. Dry each layer completely.
Level and Smooth the Filler: Gently sand the dry filler smooth (600-1200 grit). Wipe away dust.
Color Matching & Application: This is critical. Use a high-quality leather dye or colorant (e.g., ) matching your leather. Apply in thin coats with a sponge, brush, or airbrush. For aniline, use specific aniline dyes (e.g., ) and gentle heat may help absorption.
Apply Leather Sealant/Topcoat: Once color is dry, apply a leather sealant (e.g.) to protect the repair and match sheen.
Condition (After Full Curing): After the sealant cures, condition the entire item.
Specific Considerations for Deep Scratches on Suede & Nubuck: Deep scratches are exceptionally difficult for DIY repair on suede and nubuck. Avoid traditional fillers and liquid dyes. Focus on vigorous brushing to lift fibers. Specialized renewal powders or sprays exist but use with extreme caution. Professional help is highly recommended.
Expert Tip Box: The Art of Blending Your Repair
Feathering is Your Friend: Apply fillers and colorants thinly at the edges to blend. Thin Coats Win: Multiple thin coats are better than one thick coat for even drying and better control. Sheen Matching is Crucial: Ensure your sealant matches the original leather sheen.
Product Spotlight: Your Scratch Repair Arsenal
Consider these essentials:
- : “Perfect for beginners and seasoned DIYers alike, this kit contains everything you need – cleaner, filler, standard color tints for mixing, sealant, and applicators – to tackle light to moderate scratches on most pigmented and top-grain leathers.” (Link to product page)
- : “Aniline leather demands a delicate touch. This kit is specially formulated with gentle cleaners, aniline-safe conditioners, and subtle color revivers for the unique needs of these beautiful, natural leathers.” (Link to product page)
- : “Don’t let scuffs dull your napped leathers. This kit includes the essential brushes and erasers to refresh the texture and minimize the appearance of everyday marks on suede and nubuck.” (Link to product page)
Manufacturers can enhance repair-friendliness by developing resilient topcoats or offering standardized repair kits. For full-grain, education on patina and quality conditioners is key.
Mending the Cracks: Restoring Integrity and Suppleness
Cracked leather looks tired and neglected. Understanding why it cracks is key to repair and prevention.
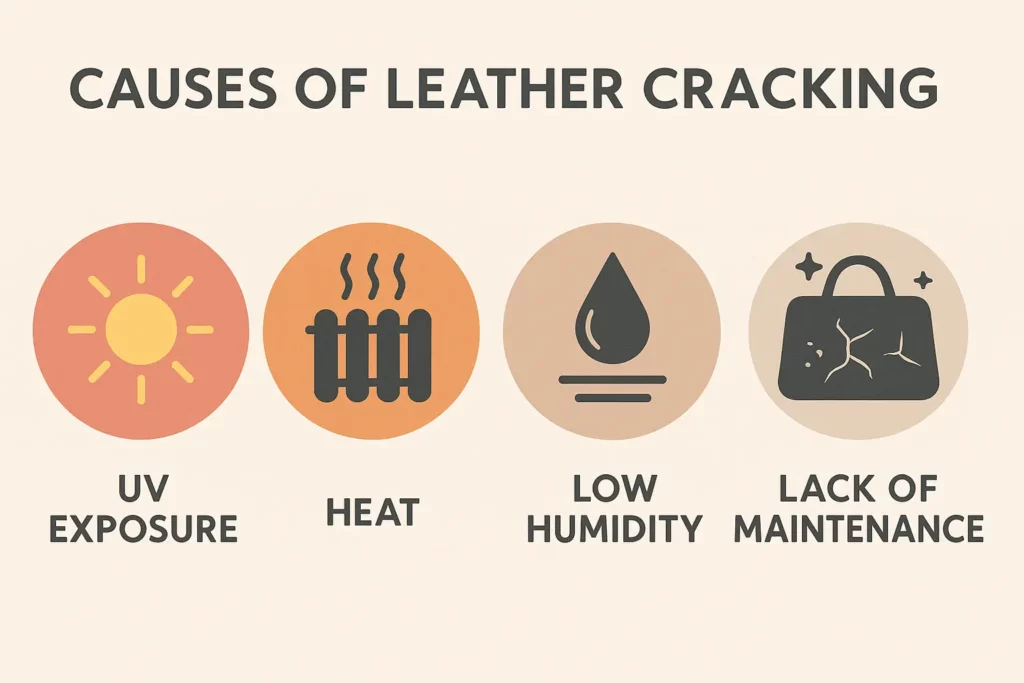
The Science of Cracking: Why Does Leather Crack? Leather cracks primarily due to a loss of its natural oils and moisture. When these diminish, fibers become dry, stiff, and brittle, then break under stress.
Factors include UV exposure/sunlight, heat, low humidity, age, lack of maintenance (insufficient cleaning and conditioning), improper cleaning with harsh chemicals, excessive stress, and sometimes manufacturing issues where the finish cracks due to improper stretching.
Visual Characteristics of Cracks on Different Leather Types: On full-grain leather, cracks often start as fine lines along grain patterns or flex areas, deepening into fissures if untreated. Top-grain leather cracks frequently initiate in the finish, appearing as fine lines that can penetrate the leather itself, with the finish potentially flaking. Pigmented leather cracks usually begin in the topcoat, sometimes as fine crazing or larger cracks exposing underlying leather, with the coating potentially flaking. Aniline leather shows dryness before cracking; cracks might start as surface crazing and develop into fissures, with the natural grain visible within. Suede and nubuck are less prone to typical cracking but can split or tear along seams or stress points if excessively dry; the nap will appear dull.
Crack progression often signals systemic issues like dehydration. Repair should be part of a comprehensive rejuvenation strategy.
A. Repairing Minor Surface Cracks & Crazing
For fine cracks, rehydrate and restore flexibility, often without fillers.
Full-Grain, Top-Grain, and Aniline Leather: Clean thoroughly then deeply condition. Use a pH-balanced cleaner appropriate for the leather. Apply a high-quality conditioner or hydrating cream (e.g., , or specialized aniline conditioners like or ) generously, massaging it in. Allow ample time for absorption, possibly overnight. Multiple thin applications over days may be best for very dry leather.
Expert Tip for Aniline Leather (and very dry full-grain): A professional multi-step hydration process involves cleaning (e.g.), rinsing (e.g.), hydrating (e.g.), and replenishing oils with a fatliquor (e.g.).
Pigmented Leather: Clean thoroughly. Light crazing might improve with a conditioner for finished leathers, maintaining coating flexibility. Some care systems include products for sealing minute cracks in the topcoat. For very fine cracks, a highly flexible, fine crack filler for pigmented finishes might be used sparingly by a skilled hand, followed by color touch-up and sealant. Consider products like.
B. Repairing Deeper & More Extensive Cracks
Significant cracks usually require fillers.
Full-Grain & Top-Grain Leather (with a finished surface): Clean & Prepare: Clean thoroughly with a suitable cleaner.
Sand (Carefully, If Necessary): Gently sand rough crack edges with fine-grit sandpaper (e.g., 600-grit ) to smooth and aid filler adhesion. Wipe dust. Use extreme caution.
Apply Flexible Leather Filler: Choose a high-quality, flexible leather crack filler (e.g., [Your Company’s Pro Leather Filler], or products like or ). Apply in thin layers into cracks with a palette knife or spatula. Dry each layer.
Level & Sand Filler: Once cured, gently sand filled area smooth (600-1200 grit).
Color Match & Apply Dye/Colorant: Use a precisely matching leather dye or colorant (e.g., [Your Company’s Leather Colorant Kit]). Apply in thin coats over filled area, feathering onto surrounding leather. Dry between coats.
Seal the Repair: Apply a leather sealer or topcoat once colorant is dry.
Condition: After full cure (24-48 hours), condition the entire item.
Aniline Leather (Deep Cracks): Repairing deep aniline cracks is extremely challenging for DIY. The goal is to stabilize cracks and improve appearance, not achieve invisibility. Deep hydration first (cleaning, hydrating e.g., fatliquoring e.g.). If filling, use very fine, flexible fillers for aniline (e.g., or ) with extreme caution. Color with aniline dyes that penetrate. Professional restoration is almost always recommended.
Pigmented Leather (Deep Cracks): Process is similar to finished full/top-grain, focusing on repairing the pigmented finish. Clean (e.g. or ). Prep with alcohol cleaner and light sanding. Fill with flexible fillers (e.g., or ), applying thin layers, drying, and sanding. Apply matching pigmented leather paint/colorant, possibly stippling with a sponge. Finish with a clear sealer/topcoat matching original sheen. Look for kits like.
Key Considerations Box: Filler Flexibility & Color Matching – The Twin Pillars of Crack Repair
Filler Choice is Paramount: Always use a flexible filler for leather (e.g., or ). The Art and Science of Color Matching: Crucial for pigmented/finished leathers. Use manufacturer color charts or custom matching services (e.g., ). Always test mixed color on an inconspicuous area and let dry. Apply color in thin layers.
Crack repair often needs a holistic approach: clean, repair, then condition and protect the entire piece.
Weathering the Storm: Conquering Water Damage on Leather
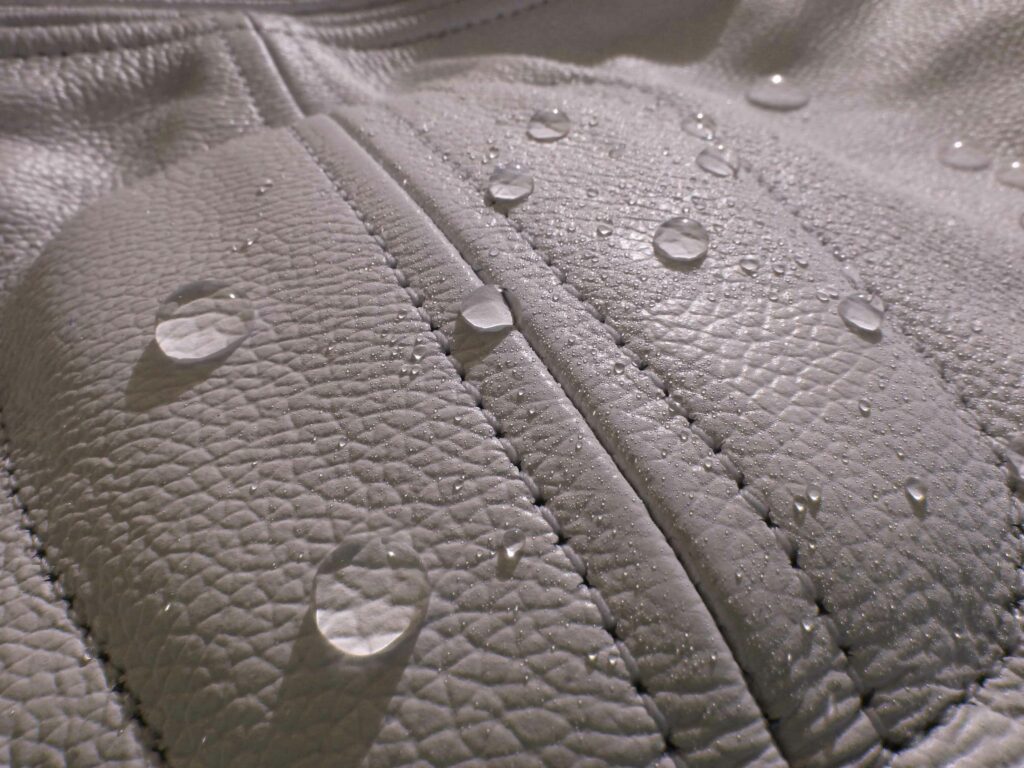
Water can be tricky for leather. Significant exposure can cause stains, texture changes, and structural damage.
Understanding Water’s Impact on Different Leathers: Water damages leather by disrupting its oil balance. Oils bind to water molecules and are drawn out as water evaporates, leaving leather dry, stiff, and brittle. Water can also cause dyes to migrate, leave mineral deposits, lead to mold if damp too long , or cause stretching.
Full-grain leather, despite some natural resistance, isn’t waterproof and can stiffen and stain. Top-grain leather’s finish offers initial protection, but saturation can lead to stiffening, color changes, and cracking. Pigmented leather has the most water resistance due to its topcoat, but prolonged contact or seepage can still cause issues. Aniline leather is most vulnerable, absorbing water immediately, often causing dark stains, rings, stiffening, and color bleeding. Suede and nubuck are extremely absorbent, easily damaged by water, leading to matting, stiffness, color issues, stretching, and prominent stains.
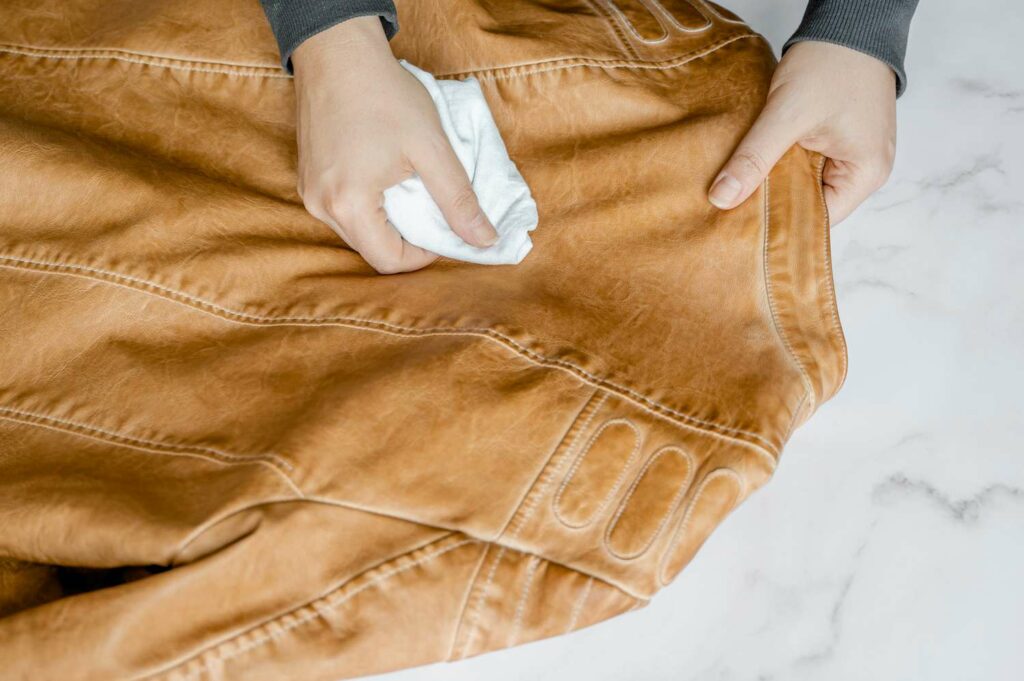
A. Emergency Response: What to Do IMMEDIATELY When Leather Gets Wet
Swift action is key. Blot, Don’t Rub! Use a clean, absorbent cloth (microfiber is great) to gently blot excess water.
Air Dry Naturally & Slowly. NEVER use direct heat (hairdryers, radiators). Dry in a cool, well-ventilated room away from direct heat/sunlight.
Maintain Shape During Drying: Stuff bags/shoes with plain newspaper or paper towels. Hang garments on padded hangers.
Specific Actions: For full-grain, blot, stuff, air dry until just damp, then condition. For top-grain, blot, stuff, air dry completely. For pigmented, wipe excess, air dry thoroughly. For aniline, blot immediately, air dry completely. For suede/nubuck, blot gently, stuff, air dry. Once dry, brush to restore nap. Some suggest lightly dampening the entire suede/nubuck panel with clean water to prevent tide marks, then dry uniformly.
B. Erasing the Evidence: Removing Water Stains
Once dry, stains may remain.
General Water Stains (Rings, Darkening, Tide Marks): For full-grain, top-grain, or pigmented leathers, clean the entire affected panel with a mild, pH-balanced leather cleaner. A DIY solution of equal parts white vinegar and distilled water can work; wipe gently, then wipe with clean distilled water. Test first. Products like [Your Company’s Gentle Leather Cleaner for Finished Leathers] or professional systems like are good. After cleaning and drying, apply conditioner.
For aniline leather, stains are difficult. Try carefully re-wetting the entire panel evenly with distilled water or a specialized aniline cleaner (like or ), working from stain center outwards. Professional systems like use a multi-step process. Thorough conditioning is vital post-drying.
For suede and nubuck, if water spots appear, lightly dampen the entire item/panel with clean water (fine mist). Use a suede/nubuck brush to work moisture and lift nap. Air dry. Use a suede eraser on remaining marks. Brush vigorously to restore nap. Specialized cleaners can also be used.
Salt Stains: For full-grain, top-grain, or pigmented leather, brush off loose salt. Wipe with a cloth dampened with equal parts white vinegar and cool distilled water. Let sit, then wipe with clean distilled water. Air dry. Condition thoroughly. Products like or DIY vinegar solution can be used. Commercial removers are also available.
For aniline leather, test any solution first. A very dilute vinegar/distilled water mix (1:10) can be tried, blotting gently. Or use specialized aniline cleaners (e.g., or ). Condition with aniline-specific conditioner.
For suede and nubuck, brush off loose salt. Dab with a cloth dampened with equal parts white vinegar/water, or a very dilute mild soap solution. Blot gently. Air dry. Brush to restore nap; use a suede eraser for persistent marks. Baking soda can also be sprinkled on dry salt stains, let sit, then brushed off. Products include suede brush, eraser, white vinegar, specialized cleaners. is a protective spray.
Oil-Based Liquid Stains (Grease, Food Oil): For full-grain, top-grain, or aniline (smooth leathers), act FAST. Blot excess oil. Apply absorbent powder (cornstarch, talcum powder, baking soda) generously, let sit for hours/overnight. Brush off. Repeat if needed. For lingering stains on pigmented/top-grain, gently wipe with mild dish soap/water solution (test first). For aniline, stick to powders; if stain persists, professional help or specialized degreaser (e.g., ) is needed.
For suede and nubuck, absorbent powders are the first defense. Blot oil, apply powder, let sit overnight, brush off. For persistent stains, use specialized suede/nubuck cleaner or degreaser.
C. Restoring Suppleness & Appearance Post-Damage
After water exposure and cleaning, leather will likely be stripped of oils. Deep conditioning is vital. Choose a high-quality conditioner for your leather type (e.g., [Your Company’s All-Purpose Leather Conditioner] or [Your Company’s Aniline Care Cream]). Apply evenly, let penetrate, buff off excess. Multiple light applications over days may be best for severely stiffened leather.
For suede/nubuck, after drying and any specialized “conditioner” (usually light sprays), vigorously brush the nap with a dedicated brush to restore texture.
If color loss remains, color restoration with appropriate dyes/balms might be needed. This is advanced. For pigmented leathers, use pigmented dyes/kits. For aniline, use aniline-specific dyes; professional help is often best. For suede/nubuck, specialized colored sprays exist but matching is hard; professional help advised.
D. Mold Prevention & Remediation Post-Water Exposure
Wet leather is prone to mold if not dried thoroughly. Prevention: Ensure thorough drying. Store in a cool, dry, well-ventilated area. Use breathable dust bags, not plastic. Use dehumidifiers in humid areas.
Remediation: Wear gloves/mask. Work in ventilated area. Brush off loose spores outdoors. Wipe with mild soap/water or vinegar/water solution. Dry thoroughly. Condition. For persistent mold, seek professional help.
Expert Tip Box: The Patience Game with Wet Leather – Avoid Costly Mistakes!
The most common mistake is rushing drying with heat, leading to irreversible stiffness and cracking. Gentle, even, slow air drying is paramount. Patient, thorough conditioning after drying is essential. When in doubt, especially with valuable items, blot water and air dry before consulting a professional.
Effective water damage repair is about restoring the leather’s oil/moisture equilibrium and managing visual discrepancies. This often requires a holistic, patient approach.
The Professional Touch: When to Entrust Your Leather to an Expert
While many issues are DIY-friendly, sometimes a professional leather restoration specialist is needed. Knowing when to call can save items from irreversible damage.
Criteria for Calling a Professional: Seek help for severe damage like large tears, holes, or deep punctures, especially on delicate leathers. Extensive or deep cracking, particularly if leather is brittle, often needs professional techniques for rehydration and reinforcement. Severe color loss or stubborn stains (ink, oil) usually require professional color restoration, especially on absorbent leathers like aniline or suede.
Delicate leathers like aniline, suede, and nubuck are less forgiving of DIY mistakes. Leathers with special finishes (metallic, patent, pull-up, exotics) also often need specialized care. For high-value items (designer goods, antiques, sentimental pieces), the risk of DIY damage outweighs cost savings.
Complex repairs like structural issues, panel replacement, or perfect color matching for unique/faded colors are best for professionals. If you lack skill or comfort, consult an expert to avoid worsening the problem.
What Professional Leather Restorers Offer: They provide expert diagnosis, specialized tools and products (airbrushes, custom dyes, advanced fillers ), and advanced techniques like precision filling and grain matching. They can handle comprehensive restorations like re-dyeing or structural repairs.
Key Consideration: Consultation Can Be Valuable Even for moderate damage, a consultation can offer advice or identify pitfalls. Some offer partial repair services. The decision balances risk (item value vs. DIY damage) and desired outcome (improvement vs. perfect restoration). For manufacturers, offering or partnering with repair services adds value and builds trust.
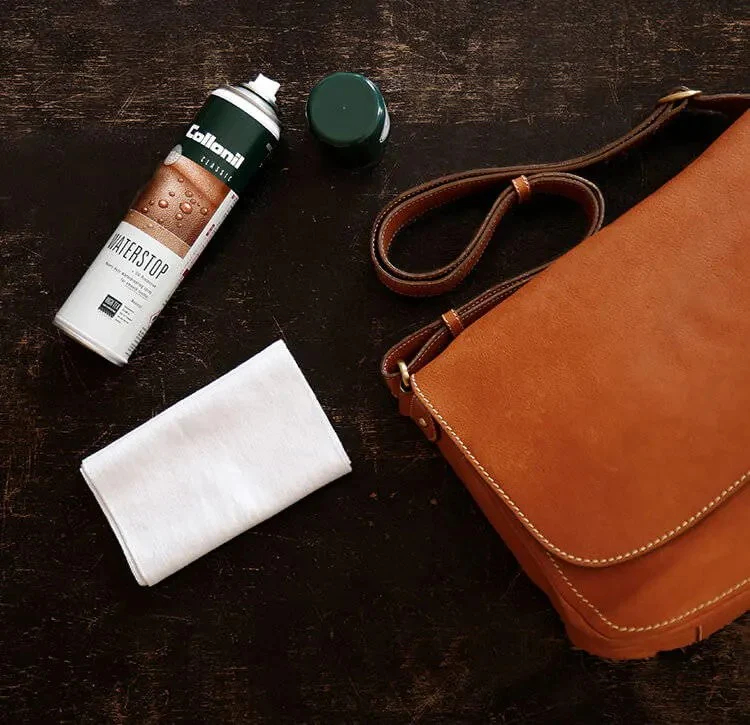
The Art of Prevention: Proactive Care for Enduring Leather Beauty
An ounce of prevention is worth a pound of cure. Regular, appropriate preventative care is the most effective way to keep leather looking its best and minimize repairs. This maintains structural integrity, making leather more resilient. The core of proactive care is: Clean, Condition, and Protect.
A. Tailored Cleaning Routines: The First Line of Defense
Regular cleaning removes abrasive dirt, dust, and oils. General Principles: Dust regularly with a soft, dry cloth or vacuum with a soft brush. Attend to spills immediately by blotting. Always test cleaners on an inconspicuous area first.
Cleaning Specifics: Full-Grain: Wipe with a slightly damp cloth; use specialized cleaner (e.g., [Your Company’s Full-Grain Gentle Cleanser]) for deeper cleaning. Top-Grain: Wipe with damp cloth; mild soap solution or specialized cleaner for soiled areas. Products like are often recommended. Pigmented: Easiest to clean. Wipe with damp cloth; mild soap or pigmented leather cleaner for thorough cleaning. Examples: or [Leather Hero Cleanse (No.1) ]. Aniline: Gentlest approach. Dust regularly. Use distilled water sparingly or specialized aniline cleaner (e.g., , or [Your Company’s Aniline Gentle Foaming Cleaner]). Suede: Regular brushing with suede brush is primary. Suede eraser for minor marks. Avoid water. Specialized cleaners for stains. Nubuck: Similar to suede. Regular brushing with nubuck brush/cloth. Nubuck eraser for light marks. Specialized cleaning solutions for deeper cleaning. The system is an example.
B. Strategic Conditioning: Maintaining Suppleness and Strength
Conditioning replenishes oils, keeping fibers lubricated, flexible, and strong. Frequency: Generally every 3 to 12 months, depending on leather type, use, climate, and exposure. Full-Grain: Every 3-6 months. Top-Grain: Once or twice a year. Pigmented: Annually or as needed; water-based conditioners often recommended. Aniline: Every 3-6 months; use aniline-specific conditioners. Suede & Nubuck: Generally NOT conditioned with traditional creams/oils as they mat the nap. Focus on cleaning and protective sprays. Some light “suede conditioner” sprays exist but are more for refreshing.
Choosing/Applying Conditioner: Select conditioner for your leather type (e.g., [Your Company’s Premium Leather Conditioner] or [Your Company’s Aniline Hydrating Cream]). Apply small amount to cloth, rub gently in circular motions, let penetrate, buff off excess.
C. Essential Protective Measures: Shielding Your Leather
Protective treatments create an invisible barrier against water, stains, UV damage, and dye transfer.
Types of Protectors: Water & Stain Repellents: For full-grain, top-grain, pigmented leathers, options include wax-based (e.g.) or fluoropolymer/nano-technology sprays (e.g.). Silicone sprays exist (), but some caution against heavy use. Test first. Products like or are versatile. For aniline, use protectors safe for its natural finish (e.g.). For suede & nubuck, protection is crucial. Use specialized sprays (e.g.) that don’t mat nap. Reapply regularly.
UV Inhibitors: Important for aniline and light-colored leathers. Some protectors include them (e.g., [Leather Hero Protect (No.3) ]). Positioning away from direct sunlight also helps.
Stain Guards / Dye Transfer Inhibitors: Many water repellents offer stain protection. Specific anti-soiling barriers for light-colored leathers prone to dye transfer can be beneficial.
Application: Apply to clean, dry leather. Spray evenly, 6-8 inches away. Two light coats better than one heavy. Dry completely. Reapply periodically.
Investing time in regular care extends leather’s life and beauty. For manufacturers, promoting compatible care products adds value and ensures customer satisfaction.
Table 2: Preventative Care Quick Reference by Leather Type
| Leather Type | Recommended Cleaning Method & Frequency | Conditioning Frequency & Type | Key Protective Measures & Products |
|---|---|---|---|
| Full-Grain | Wipe with damp cloth (weekly/as needed); Specialized cleaner (monthly/quarterly) | Every 3-6 months; Quality cream/oil-based conditioner (e.g., [Your Company’s Full-Grain Nourisher]) | Water/stain repellent (wax or fluoropolymer-based, e.g.); UV protection if in direct sun. Consider for general protection. |
| Top-Grain | Wipe with damp cloth (weekly/as needed); Mild soap or specialized cleaner (monthly/quarterly) | Every 6-12 months; Cream conditioner for finished leather (e.g.) | Water/stain repellent (e.g.); UV protection. |
| Pigmented | Wipe with damp cloth (weekly); Mild soap or pigmented leather cleaner (quarterly) | Annually or as needed; Light, water-based conditioner for topcoat flexibility (e.g.) | Protective cream/spray with UV inhibitors (e.g., [Leather Hero Protect (No.3) ]); Good stain resistance from finish. |
| Aniline | Dust regularly; Specialized aniline foaming cleaner sparingly (as needed) | Every 3-6 months; Aniline-specific conditioner (e.g., [Your Company’s Aniline Hydrator]) | Aniline-specific protector for stains & light moisture (e.g.); Crucial UV protection (e.g.). |
| Semi-Aniline | Similar to Aniline, but can tolerate slightly more robust cleaning | Every 3-6 months; Conditioner safe for semi-aniline (e.g.) | Protector suitable for semi-aniline (e.g.); UV protection. |
| Suede | Regular brushing with suede brush; Suede eraser for marks; Specialized cleaner for stains (as needed) | Generally NOT conditioned with creams/oils. Some light refresher sprays exist. | Crucial: Suede-specific water & stain repellent spray (e.g.). Reapply regularly. Store away from moisture & sun. |
| Nubuck | Regular brushing with nubuck brush/cloth; Nubuck eraser; Specialized cleaner (as needed) | Generally NOT conditioned with creams/oils (Muleskinner exception ). | Crucial: Nubuck-specific water & stain repellent spray (e.g.). Reapply regularly. UV protection beneficial. Store carefully. |
Conclusion: Preserving the Legacy of Leather
Leather, in its many forms, is a testament to enduring quality and craftsmanship. From rugged full-grain developing its patina, to sleek pigmented leather, each type requires a nuanced approach to care and repair.
Throughout this guide, we’ve seen that knowledge is power. Understanding your specific leather type is the crucial first step. Prompt and correct action can mitigate damage. Proactive care – cleaning, conditioning, and protecting – is the best defense against the common adversaries of scratches, cracks, and water damage. And knowing when to tackle a repair yourself versus calling a professional ensures your leather goods receive the best possible treatment, preserving their beauty and function for years, even generations, to come. This commitment to understanding and maintaining leather not only enhances the user experience but also underscores the inherent value and longevity of well-crafted leather products.